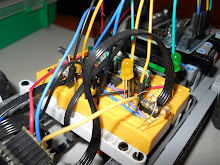
It's a modification to the truck of the 8258 alternative model to make it a remote controlled vehicle via a pair of Arduinos.
In fact this is a proof of concept for future, more elavorated, models. I had the model already built and the goal was to make it remote controllable with the minimum effort. So, no asthetic goals, complicated solutions... just a proof of concept.
The project has two parts:
1- The truck itself. With a motor to power the car governed by an HBridge, a servo for the steering, a radio receptor to receive commands and an Arduino to control it all.
2- The remote. With a Wii nunchuck, a radio emitter and an Arduino.
It this video you cand see it in action.
My first intention was to write two big posts. The first one about the construction process and the second about the programming. The problem is that I don't have the time. So I've decided to write short posts focused in a simple aspect of the project every time.
So this is the first post of a serie: the introduction.
In the next weeks I'll try to write a post a week and put a link in this first post every time new one is published.
Enjoy!

Hello,
ReplyDeletei would like to know the model of servo you used ?
Hi,
ReplyDeletethe servo is a Futaba S3003, but any other model ca be used. The only problem is to fit it in the lego structure. I hope soon I have the time to write the rest of the posts, one of them devoted to the steering mechanism.
Thx for your response,
ReplyDeletei'll wait for your next posts
Hi, I'm curious about how you managed to connect the PF motors to an H-bridge. I'm currently in the process of designing a similar vehicle (which would bw controlled by an android device, rather than the wii nunchuck), and I found a way to connect the old 9V motors to an H-bridge (by drilling small holes into the studs of a standard lego brick and sticking wires through these holes), but I haven't figured out how to reliably connect the PF connector.
ReplyDeleteHi,
ReplyDeletethis will be explained in a future detail post... but I don't know when I will have the time to do it... Meanwhile, I can say that to connect the motors and battery box to the hbridge I just cutted a standard PF wire and resoldered pin terminals. I used an extension wire to mantain untouch the original lego elements (motor and battery box).
Regards.
Oh, that's what I was afraid of. I wanted to avoid damaging PF pieces (drilling through a system brick is ok, as I have plenty of those), but it seems I have little choice.
ReplyDeleteHi again,
ReplyDeleteif you have budget, use that http://shop.lego.com/ByTheme/Product.aspx?p=8871&cn=587&d=70 and you won't damage any important lego part.